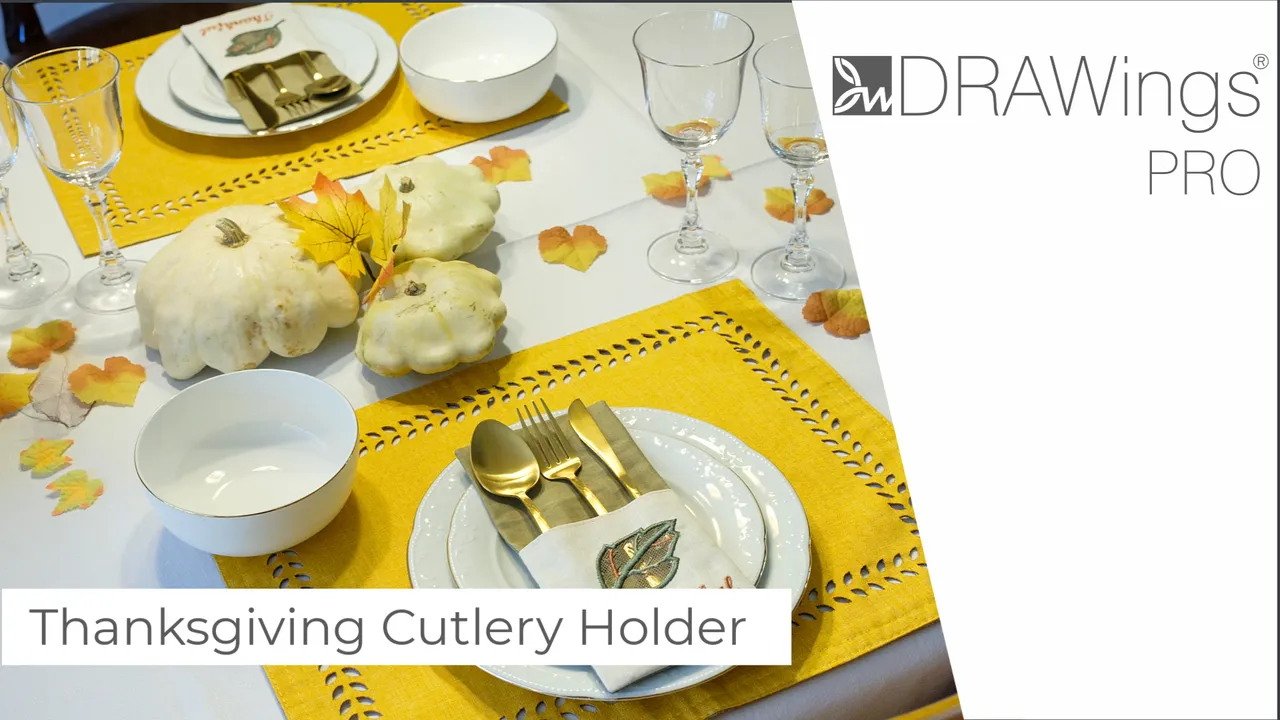
Create a Cutlery Holder with Leaf-shaped Tulle Appliqué
Elevate your Thanksgiving table or any other dinner table with a handmade touch! Learn to craft a stunning cutlery holder using the DRAWings PRO embroidery software. Our step-by-step tutorial guides you from designing a delicate leaf pattern to the unique transformation of tulle appliqué.
Gather your materials, follow along with our easy instructions, and impress your guests with a personalized touch at your feast. Watch, learn, and create your own cutlery holder masterpiece.
Materials Needed:
- DRAWings PRO XII embroidery software
- Embroidery machine with appropriate hoop size
- Small piece of tulle (approximately 10cm by 7cm / 4” * 3”)
- Stabilizer and water-soluble stabilizer
- Cutting needles (if not cutting manually)
- Assorted embroidery threads
- Adhesive spray
- Fabric for the cutlery holder
- Hoop
- Pins or paper tape
Step 1: Setting up the Working Area
- Open the DRAWings PRO XII software and select a suitable hoop size. In this tutorial, we use a rectangle with dimensions 11cm in width and 12cm in height.
- Remove the fill from the rectangle and set it as the work-area guide.
- Access the Clipart library and choose a leaf shape, such as “Floral leaf 01,” adjusting its size to approximately 9cm in width.
- Ungroup the leaf, add an outline color, and remove the fill.
- Separate the leaf into sub-objects and use the node editor to create a center line.
- Utilize the Break apart function for each sub-object, removing the center line.
- Join the two halves into one, ensuring the outline is closed.
- Duplicate the leaf for reference, assign different colors, and use the auto-border tool to create guidelines for cutting.
Step 2: Creating Cutwork and Decoration
- Combine the two leaf sides for cutwork, setting the outline type to cutwork.
- Use running stitches before the cut and set the line offset.
- Arrange a green line to hold the tulle in place and create an outer line for tulle fixation.
- Employ the outline shapes tool to design leaf veins, breaking them apart for further customization.
- Set the primary and secondary veins to satin serial with appropriate outline widths.
- Convert outlines to objects for fine-tuning with the node editor.
- Duplicate and arrange elements such as the stem, midvein, and leaf shape, adjusting their types and widths.
Step 3: Adding Lettering and Finalizing Design
- Use the lettering tool to add a personalized message, adjusting colors and positions.
- Create a rectangle shape for the final cut line, adjusting its dimensions for seam allowance.
- Review the embroidery sequence and optimize the order for smoother execution.
Step 4: Embroidering the Design
- Prepare the materials: tulle, stabilizer, cutting needles (if applicable), assorted threads, and adhesive spray.
- Spray the stabilizer with adhesive, place the fabric on top, and hoop them together.
- Load the design into the machine, ensuring proper thread colors are available.
- Start with a running stitch for fabric stabilization, then proceed to cut the fabric according to guidelines.
- For those using cutting needles, switch needles as prompted, cutting at different angles.
- After cutwork is completed, detach the hoop and remove the cut fabric.
- Spray water-soluble stabilizer, affix tulle, and secure with pins or tape.
- Reattach the hoop, embroider running stitches to secure the tulle, and continue with decorative elements.
- Remove pins before embroidering the outer line (cutting line).
- Once embroidery is complete, remove the fabric from the hoop, trim excess stabilizer, and wash away water-soluble stabilizer.
- Iron the embroidered piece with a protective fabric on top.
Step 5: Assembling the Cutlery Holder
- Fold and stitch the top edge of the embroidered fabric for a clean finish.
- Position the pocket on the linen fabric, securing with pins, and layer front and back linens.
- Sew around, leaving an opening for turning.
- Trim corners, turn right sides out, shape edges, and iron flat.
- Close the opening with ladder stitch or adhesive hem tape.
- Your Thanksgiving cutlery holder is ready for use!
Congratulations! You’ve successfully created a stunning cutlery holder using DRAWings PRO XII embroidery software. This detailed guide ensures that both beginners and experienced crafters can replicate the project with ease. Personalize your Thanksgiving dinner table or create thoughtful party favors for guests by embroidering a set of these unique cutlery holders. Happy Thanksgiving!
DRAWings PRO Help Group
Happy crafting and don’t forget to share your creations with us in the
DRAWings PRO Help Group!
You can download the .DRAW file of the project, for free, from the link below:
- Project’s .DRAW file: Cutlery Holder
It can open only with the XI and later versions of DRAWings embroidery software
Check also, our related projects “DIY Drawstring Backpack with Applique Decoration“, “How to Make a Detachable Collar with an Embroidered Monogram” & “HOW TO MAKE A BEAUTIFUL RABBIT KEY COVER FROM SCRATCH” & “DIY: HOW TO MAKE A CUSTOM GLASSES CASE WITH YOUR OWN DESIGN“
Remember, DIY projects are all about creativity and adaptability, so don’t hesitate to experiment and make the drawstring backpack truly your own. Happy crafting!


