Creating Festive Christmas Trees with Basic Shapes
Creating Festive Christmas Trees with Basic Shapes is very easy. It is a wonderful way to explore creativity while crafting something that adds joy to the holiday season. With DRAWings PRO embroidery software, the process becomes a seamless blend of art and precision. This guide will take you through the entire journey of designing and digitizing a Christmas tree using basic shapes, from the initial concept to the final embroidered piece. Whether you are a seasoned user or just starting, this project is a great way to expand your skills.
Getting Started with Your Festive Design
Before diving into the design process, it’s essential to lay the groundwork for your project. Start by visualizing what you want to create. A Christmas tree offers a versatile canvas for creativity—classic layered trees, minimalist outlines, or whimsical, playful shapes can all be explored. Decide on the size of your design based on its intended use, such as decorating a tablecloth, personalizing apparel, or creating ornaments.
Prepare your embroidery machine by ensuring it’s compatible with the output format of your design software. Test your fabric and threads in advance to achieve the desired effect. For this project, consider green tones for the tree’s body, brown for the trunk, and a mix of festive colors for embellishments like baubles and garlands.
Constructing the Tree: The Triangle as a Base
The Christmas tree begins with a simple triangle shape, which serves as the tree crown. In the software, open the Shapes menu and select the Polygon tool. Set the number of sides to three to form a triangle, then click and drag to draw the shape. Center the triangle in the embroidery hoop to ensure an even and balanced design.
To add a natural flow to the tree’s edges, the shape must be refined. Open the Node Editor, a feature that allows dynamic adjustments to the geometry. Convert the triangle into an editable form by right-clicking and selecting the “Convert to Curves” option. This action changes the original dynamic nodes into cusp nodes, enabling you to manipulate individual sides without affecting the rest of the shape.
Add curves to the triangle by inserting additional nodes at the midpoint of each side. You can achieve this by selecting a node and pressing the Num+ key, which ensures the shape remains symmetrical. For smoother results, use the Auto-Smooth Node feature. This allows the software to create flowing curves based on the movement of control points. Adjust the top and bottom nodes to create a lush, organic tree crown.
Building the Layers of the Tree
Once the basic triangle is curved to your liking, duplicate the shape to create the layered sections of the tree. Scale the duplicate down to about 80% of the original size and move it upward along the vertical axis. Repeat this process to create additional layers, each smaller and placed higher than the last, until you achieve the desired number of sections for the tree. This stacking technique gives the tree its iconic tiered appearance.
At the bottom of the tree, add a rectangle to represent the trunk. Position it so that it aligns with the base of the lowest triangle layer, ensuring the proportions complement the overall design.
Adding Color and Textures
Color brings the design to life. For a traditional look, fill the triangle layers with shades of green and use brown for the trunk. Experiment with gradient fills to give depth, transitioning from darker tones at the base to lighter shades at the top. Access the fill tool and select either the color wheel or pre-set swatches for your hues. Gradients can be adjusted to follow the shape’s contours, adding dimension and realism to your tree.
If you prefer a modern or minimalist aesthetic, use bold, non-traditional colors or a monochromatic scheme. The software allows easy color adjustments and previews, so take time to experiment before finalizing your choices.
Exploring Creative Variations
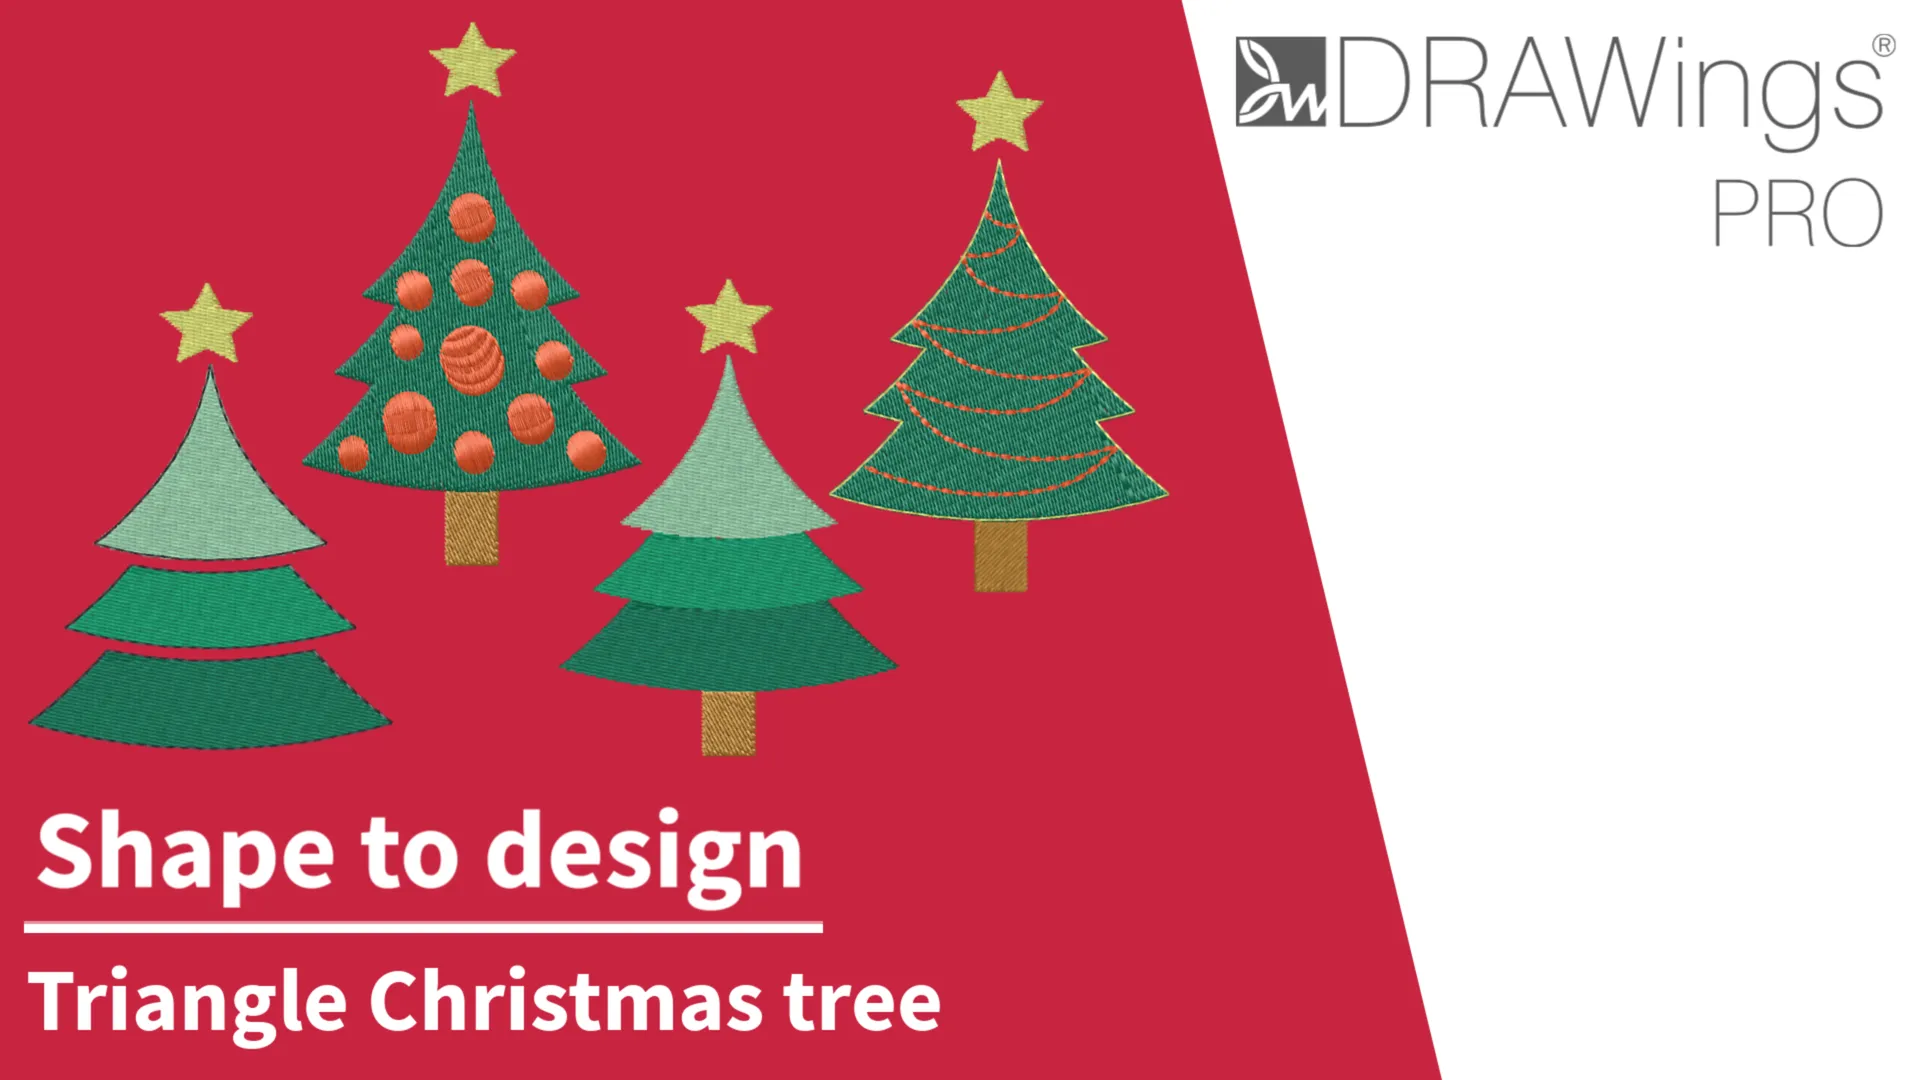
The software offers multiple shaping tools to refine or alter the tree’s appearance. Using the Trim command, you can create a clean, minimalist design by removing overlapping parts of the layers, leaving space between them. Alternatively, the Weld option combines all the layers into a single continuous shape, ideal for creating a cohesive tree silhouette.
For added visual interest, consider incorporating decorative elements. Draw circles to represent baubles and duplicate them across the tree. Use the Array Fill tool to distribute these ornaments evenly across the design. Adjust spacing and size to suit your aesthetic preferences. Another option is to draw garlands using the Outline tool. By creating smooth, flowing lines across the tree and selecting a festive stitch style, you can add a playful or elegant touch.
Preparing the Design for Embroidery
Once the design is complete, it’s time to prepare it for embroidery. Ensure that the layers are properly aligned and the shapes are scaled to fit your intended fabric. Adjust stitch types and densities to match the textures you envision. For example, satin stitches work well for baubles, while fill stitches are ideal for the tree’s body.
Pay attention to stitch order to avoid unnecessary jumps between sections. The software allows you to customize this sequence, which can save time during the embroidery process. Preview the design in stitch simulation mode to identify any potential issues before exporting the file.
Load it in the embroidery machine
With your design ready, transfer it to your embroidery machine. Choose a fabric that can handle the density of your design, and stabilize it properly to prevent puckering. Hoop the fabric securely and test the placement of the design to ensure it’s centered.
Run a small test stitch on scrap fabric to confirm the thread colors, tension, and overall alignment. Adjust your machine settings as needed before proceeding to the final embroidery.
Finishing Touches
Once embroidered, trim any excess stabilizer and carefully press the fabric to smooth out wrinkles. If the design will be part of a larger project, such as an ornament or patch, finish the edges with a clean trim or decorative border. For apparel, double-check the durability of the stitches, especially on areas subject to wear.
Take a moment to admire your work and consider ways to showcase your design. Whether displayed as part of a holiday décor collection or gifted to a loved one, your festive Christmas tree will surely bring joy.
Conclusion
Creating a festive Christmas tree design using basic shapes demonstrates the power and flexibility of embroidery software. By combining simple geometric forms with creative adjustments, you can craft unique designs that are both beautiful and functional. This project not only teaches foundational skills like node editing and layering but also opens the door to exploring more advanced features like gradients, array fills, and decorative stitches. Whether you stick to the basics or add elaborate embellishments, the possibilities are endless.
DRAWings PRO Help Group
Happy crafting and don’t forget to share your creations with us in the
DRAWings PRO Help Group!
You can download the .DRAW file of the project and the image used, for free, from the link below:
- Project’s .DRAW file: Creating Festive Christmas Trees with Basic Shapes
It can open only with the XII and later versions of DRAWings embroidery software
Check also, our related projects “Creating an In-the-Hoop Tablet Case with Quilted Design Using Array Fill“, “Puff Foam embroidery: Mastering 3D Embroidery on Hats“, “DIY Drawstring Backpack with Applique Decoration“, “How to Make a Detachable Collar with an Embroidered Monogram” & “Create Eye-Catching BBQ Apron Designs with Stunning PaintStitch Embroidery“


