Create Eye-Catching BBQ Apron Designs with Stunning PaintStitch Embroidery
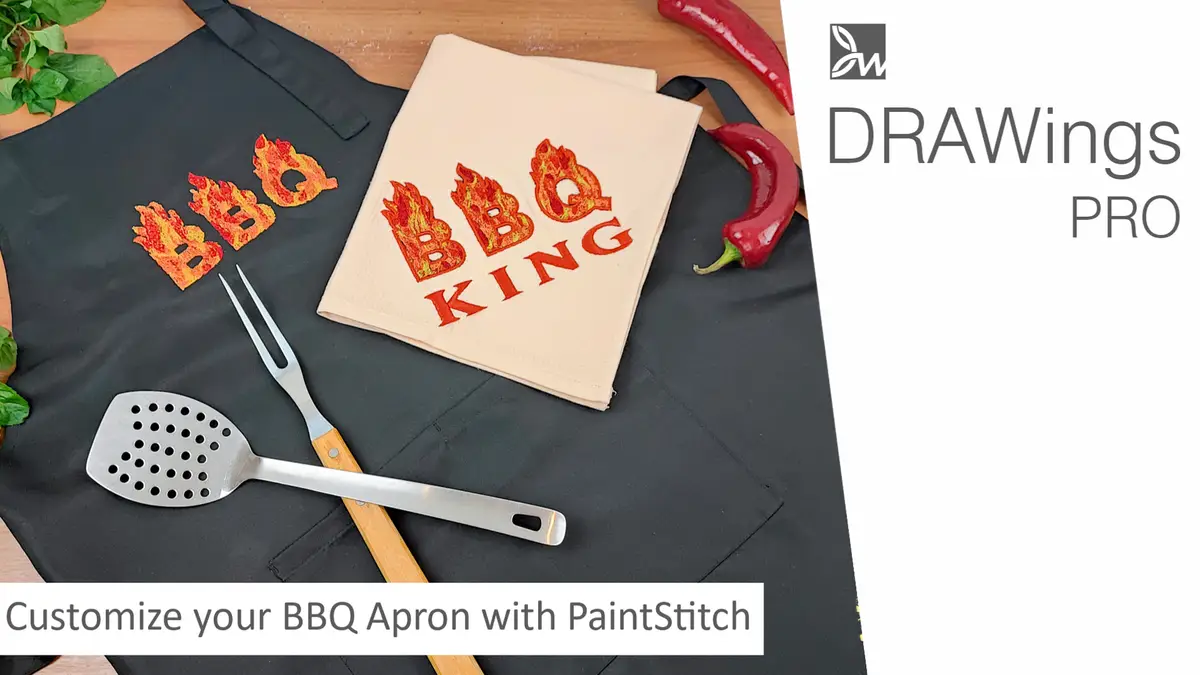
Are you looking to learn how to create a BBQ apron designs with Stunning PaintStitch Embroidery with DRAWings PRO Embroidery software? In this post, we’ll explore one of our standout features, PaintStitch, and demonstrate how you can use it to create a unique and realistic BBQ logo for an apron. This personalized apron makes for a perfect gift for anyone who loves to cook or grill. Let’s dive into the process and see how you can achieve this stunning embroidery design.
Getting Started with Your BBQ Apron Design
Starting with a clear vision for your BBQ apron design is essential. In DRAWings PRO, we have a range of tools to help you bring your creative ideas to life. The lettering tool is a fundamental feature you’ll often use. For this project, type “BBQ” in capital letters. Choosing a bold font like Arial Black ensures that the design is clear and impactful. Setting the font size to 50 helps in achieving a final design that’s approximately 15 cm wide, providing a good balance between visibility and detail on your apron.
This step sets the foundation for your embroidery project. It’s crucial to select a font and size that work well with the embroidery process. Arial Black is a popular choice due to its simplicity and boldness, making it ideal for creating a striking logo. The size ensures that your design is prominent without overwhelming the apron’s surface.
Adding Realistic Flames with PaintStitch
The magic of PaintStitch lies in its ability to convert images into stunning embroidery patterns. For our BBQ logo, we’re adding a realistic flame design. You can use a personal photo or an image you have the license to use. In this tutorial, we’ve provided an image of flames that you can use.
Import the image using the “From File” option, and select “Open as PaintStitch” from the dialog box. This feature automatically converts your image into a PaintStitch design, thanks to advanced algorithms. Ensure your image dimensions are wider than 150mm and taller than 100mm to fully cover the text.
Customizing your PaintStitch results can significantly enhance your design. In the Properties toolbar, you can adjust the thread palette to get a better preview of the final output. Specifying the number of colors is crucial; more colors mean more details but also more thread changes during embroidery. Finding the right balance is key to achieving a detailed yet manageable design. Full blending of colors can make transitions smoother, enhancing the realistic effect of the flames.
Integrating the Flame Design
Once you have your PaintStitch flames ready, it’s time to integrate them with your text. This step involves positioning the text behind the flame image and using the Intersect option from the Shaping tools. Selecting the PaintStitch part last is important because the new object will inherit its properties.
This integration step transforms your basic text into a visually engaging design. The Intersect tool is powerful for combining shapes and fills, making your text appear as if it’s crafted from the flames themselves. Deleting the original parts you no longer need simplifies your workspace, keeping your project organized.
Enhancing the Design with Flame Effects
To add a dramatic flair to your BBQ logo, consider modifying the text to simulate the outline of real flames. This can be done in several ways. The node editor allows you to manually adjust the shape of the letters, giving you precise control over their appearance. Alternatively, you can import a flame-like image from the clipart or symbol library. Using the knife tool, you can split this image, adjust it to look like a flame, and then weld it to your logo.
For those more experienced in digitizing, creating a flame shape from scratch using digitize tools might be a preferable option. Each method provides a different level of customization, so choose the one that best fits your skill level and design needs.
Materials Needed
- The Apron
- The printout of the design
- A Ruler to help us align the design
- A Fabric marker
- Iron on stabilizer
- The Hoop
- Necessary threads
- And Fusible backing
Preparing Your Apron for Embroidery
Before you start embroidering, it’s important to prepare your apron properly. Begin by folding the apron in half and pressing it to mark the center front. Unfold the apron and use a fabric marker and ruler to mark the center. Position your printed design at the desired height—generally, 10cm to 15cm below the top edge of the apron—and mark the sides.
Ironing an iron-on stabilizer on the wrong side of the apron provides extra support during embroidery. Using two layers of stabilizer can help prevent fabric puckering and ensure a smooth finish. Aligning the marks on the apron with those on the hoop is crucial for accurate placement. Use pins to secure any excess fabric or straps that might get in the way, but be careful not to damage your machine.
Embroidering the Design
Loading your design onto the embroidery machine and starting the embroidery process is the next step. Follow the machine’s instructions for changing thread colors as needed. This step-by-step approach ensures that each part of the design is stitched correctly, resulting in a high-quality final product.
Once the embroidery is complete, remove the apron from the hoop and trim away any excess stabilizer. For a cleaner finish on the back, consider using iron-on fusible backing. This not only protects the stitches but also gives the back of the apron a polished look.
Final Thoughts
Creating a beautifully embroidered BBQ apron is a rewarding project, especially when using powerful features like PaintStitch in DRAWings PRO embroidery software. By following these steps, you can achieve a professional-looking design that’s perfect for gifting or personal use. The ability to customize and refine each element of your design allows for endless creativity.
Whether you’re a beginner or an experienced user, this tutorial provides all the information you need to make the most of PaintStitch. Stay tuned for more tips and tricks from DRAWings PRO, and happy embroidering!
Stay tuned for more tips and tricks, and happy embroidering!
DRAWings PRO Help Group
Happy crafting and don’t forget to share your creations with us in the
DRAWings PRO Help Group!
You can download the .DRAW file of the project, for free, from the link below:
- Project’s .DRAW file: Create Eye-Catching BBQ Apron Designs with Stunning PaintStitch Embroidery
It can open only with the XII and later versions of DRAWings embroidery software
Frequently Asked Questions
Check also, our related projects “Puff Foam embroidery: Mastering 3D Embroidery on Hats“, “DIY Drawstring Backpack with Applique Decoration“, “How to Make a Detachable Collar with an Embroidered Monogram” & “HOW TO MAKE A BEAUTIFUL RABBIT KEY COVER FROM SCRATCH” & “DIY: HOW TO MAKE A CUSTOM GLASSES CASE WITH YOUR OWN DESIGN“,”DIY Valentine’s Day Special: Create Your Own Split Heart Keychain“


