DIY embroidered Christmas ornaments: Get into the holiday spirit
Are you getting into the holiday spirit yet? If not, we have just the thing to get you in the mood! In this video, we will show you how to make an adorable Christmas ornament using cutwork outline type. This is an excellent craft for beginners and it’s a lot of fun! Once you’re done, you can hang your ornament on your tree or give it to someone special as a gift.

Cutwork is a special embroidery type, which allows you to use the embroidery machine to create cuts on fabric. To use Cutwork, you need to have a special set of CUTTING needles which are used instead of the regular embroidery ones, to make cuts on the fabric. If you don’t have a set of Cutting needles, don’t worry; you can still carry out this project, either by cutting the fabric with scissors yourself or by making the ornament without a hole in the middle.
Make the Christmas ornaments
For cutwork, dense woven fabrics from natural materials are recommended. For this project, we will choose “Normal” and “Cotton”. We will start by making a Star shape. Before drawing the shape, set the number of rays to 6. Set the Ray size to 70% and the Star angle to 90 degrees.
Click and drag to draw the star and hold the “Ctrl” key pressed down while dragging, to keep the proportion. Release the mouse to finalize the shape. Make sure you have the “Proportional” option checked and set the “Height” to 70 mm.
Put the star at the center of the hoop using the “Center to Hoop” button on the “To machine” menu. Make a duplicate of the Star to use later for the cutwork part. Scaling this one to 75%, as the inner star cutwork will be smaller than the outside star. This smaller, inner star will be centered inside later. Leave this star outside the design and edit the initial star slightly.
Make a Duplicate of the first star, rotate it by 30 degrees, and make it a little bit smaller by changing the Scale to 90%. To combine those two in one shape, select them together and from the “Shaping tools”, use the “Weld” tool.
Bring back the smaller star and place it to the center of the design. Enter 0 to Χ and Y position to place the small star at the center of the hoop. Choose the outer star, set its “Outline” to “Satin serial” and the “Outline width” to 4mm. Set the Offset to 3,0 mm and remove the fill color as we won’t need it.
Make the cutwork
Select the smaller star and set its outline to “Cutwork”. Change the “outline width” to 3,0 mm, check the “Running before” option and set the “Offset” to 1,0 mm. This will add a running line, to stabilize the fabric before cutting. Check the “Net fill”, to make a nice net onto the cut area and set the “Offset” to 1,2 mm.
For the “net fill” we will use a water-soluble backing material. Check the “Satin serial” and change the “Offset” to 1,0mm. This will add “Satin serial” cover stitches after the Cutwork.
Make sure you have the “Discard part” as “Internal”. Change the outline color and remove the fill color, as we don’t need it. Set the same outline color to the external star as well.

Add some small ellipse parts on the inside of some rays:
Start the Ellipse shape and click and drag to draw an ellipse. Hold the “Ctrl” key down to keep the same proportion. After finalizing the ellipse, set the size to 4mm, remove the outline color and set the fill color of your choice. To add on multiple rays, start the “Circular array” tool, set the count to 6 and fine tune the placement if needed.
Make the cutwork for the outline
You may cut this by hand afterward, so this step is optional. Select the outer star, right click and use “Autoborder” option. The Autoborder should be to the outside by 6mm. Set its outline to “cutwork”.
The “discard part” should be “External” this time. Check the process in the “slow redraw” mode. The outer star will be embroidered first, then a running line is embroidered before the cutting line followed by the black color in the Cutwork part.
Then we’ll need to place the water-soluble material and the Netfill goes on top of that. Here are the Satin serial cover stitches which are meant to cover all cut edges. The small ellipse shapes we’ve added for decoration and finally the outer cutwork.
Embroider the Christmas ornaments
The design is ready, so just prepare the necessary files and proceed with the actual making of the star.
Here’s what we’ll need:
- Fabric,
- Threads
- Stabilizer, not the sticky type.

Users who own a Set of cutting needles will also need water-soluble stabilizer for the net on top of the cutwork. For users who don’t own cutwork needles, some of the production parts may be skipped or done by hand.

Start by hooping 2 sheets of stabilizer along with the fabric, and attaching the hoop to the machine. Set the bobbin and needle thread as well. We recommend using the same embroidery thread color for the bobbin as this is a double-face project, and you’ll want the back to look nice.
Open the design and start the embroidery. The outer star and the running line that is added to stabilize the fabric before the actual cut is done. Now we will get to the cutwork part. Those of you who don’t have a cutting needle set may skip the following parts and go to the embroidery of the net. You may either skip cutting and leave the fabric behind the net OR use small scissors to cut out the part inside the running line manually.
Create the cutwork using cutwork needles
Before you go on to cutwork, you need to change the embroidery needle, with the Black cutwork needle as instructed. Insert the tip of the black cutwork needle into the cutwork needle holder. Make sure that the flat side of the needle faces the needle clamp.
Press okay after changing the needle and then press the “Start” button. Each cutting needle cuts at a different angle, therefore, to cut a shape like this you need to use all 4 cutting needles. Change the needle with the blue cutwork needle. As before, attach the “blue needle” to the needle holder and proceed.
Then continue with the red cutwork needle. Start cutting once again.

As already mentioned, each cutting needle cuts at a different angle so now that we’ve moved to a different area it’s time to change the cutwork needle once again.
Green is the fourth needle and practically the last one. After having finished with the Green cutting needle, remove the hoop from the machine and remove the cut fabric.
Sew out the Net fill over water-soluble stabilizer
We need to put the water-soluble stabilizer right on top for the net fill. Pin it in around the outside of the design.

Attach the hoop to the machine and change the needle to a sewing needle. It is time to embroider the Net and the Satin cover stitches. Remove the hoop from the machine and peel off the water-soluble stabilizer.
Complete the design
Continue with embroidering the sparkling dots, the small ellipse shapes we’ve earlier designed, inside the rays. For this part, we chose to use a metallic thread to add some sparkle. You may use whatever color thread you like to match your Christmas theme.

Attach the hoop to the machine once again and embroider these dots. The only thing left is the outer cutwork. The machine will prompt you to attach the cutting needles to have the outer fabric cut. Cutting with cutwork needles is neater than cutting by hand, but this shape is rather easy so you may wish to skip cutwork and cut it with scissors.
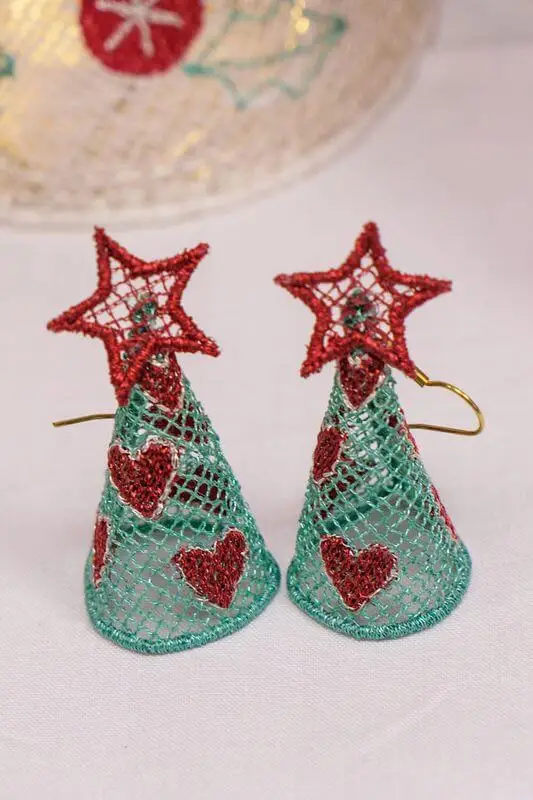
We’ve used these cutwork ornaments as Christmas tree decorations, either within clear baubles or on their own, as embellishments on gift tags or cards. We hope you enjoy making them and do share with us your own versions of these cutwork ornaments!


DRAWings PRO Help Group
Happy crafting and don’t forget to share your creations with us in the
DRAWings PRO Help Group!
You can download the .DRAW file of the project, for free, from the link below:
- Project’s .DRAW file: Embroidered Christmas Ornament
It can open only with the latest version of DRAWings embroidery software
Check also, our related projects “Advent Stocking Calendar” & “Christmas Decoration Angels“